Download VMware.3V0-22.21.VCEplus.2022-06-24.17q.tqb
| Vendor: | VMware |
| Exam Code: | 3V0-22.21 |
| Exam Name: | Advanced Deploy VMware vSphere 7.x |
| Date: | Jun 24, 2022 |
| File Size: | 4 MB |

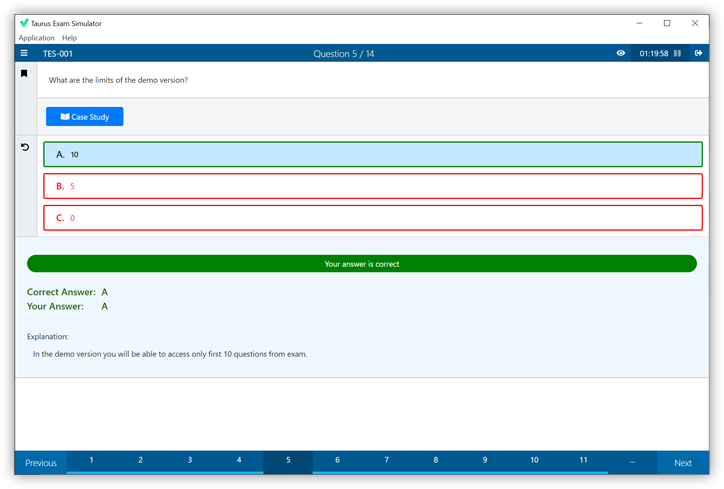
Demo Questions
Question 1
You are tasked to automate the installation and deployment of new host added into your company vSphere cluster using Auto Deploy. Ensure Auto Deploy and Image Builder is set to start automatically every time vCenter Server is
restarted. Use the web client and VCSA0la to perform this step.
Confirm that the auto deploy plugin is available in the web interface. You may be required to logout and log back in after enabling the services.
The vCenter server is required to retrieve software from an online depot. You are to use the depot provided below and ensure that Auto Deploy is always running even, with restart of vCenter server.
Name FirstDepot
URL https / / hostupdate.vmware.com/software/VUB/PRODUCTION/main/vmw-depot-index.xmlNote: ignore error that you received on cannot connect to depot. This is expected due to vCSA do nothave internet connection.
Create a deploy Rule on VCSA0la based on information below. You do not need to apply to any host at this time.
Name: Rule1
Specify Rule to match Vendor: Dell
Check 'Do Not Include Image Profile"
Check 'Do Not Include Host Profile"
Select host location: Choose cluster PROD-A
- See the Explanation below for Solution.
Correct answer: A
Explanation:
Before you can use vSphere ESXi Image Builder with the vSphere Web Client, you must verify that the service is enabled and running.ProcedureLog in to your vCenter Server system by using the vSphere Web Client.On the vSphere Web Client Home page, click Administration.Under System Configuration click Services.Select ImageBuilder Service, click the Actions menu, and select Edit Startup Type.On Windows, the vSphere ESXi Image Builder service is disabled. In the Edit Startup Type window, select Manual or Automatic to enable Auto Deploy.On the vCenter Server Appliance, the vSphere ESXi Image Builder service by default is set to Manual.If you want the service to start automatically upon OS startup, select Automatic.If you select the manual startup type, you must start the service manually upon OS startup every time you want to use the service.(Optional) Click the Start the service icon.(Optional) If you want to use vSphere ESXi Image Builder with thevSphere Web Client, log out of the vSphere Web Client and log in again.The Auto Deploy icon is visible on the Home page of the vSphere Web Client. Before you can use vSphere ESXi Image Builder with the vSphere Web Client, you must verify that the service is enabled and running.
Procedure
Log in to your vCenter Server system by using the vSphere Web Client.
On the vSphere Web Client Home page, click Administration.
Under System Configuration click Services.
Select ImageBuilder Service, click the Actions menu, and select Edit Startup Type.
On Windows, the vSphere ESXi Image Builder service is disabled. In the Edit Startup Type window, select Manual or Automatic to enable Auto Deploy.
On the vCenter Server Appliance, the vSphere ESXi Image Builder service by default is set to Manual.
If you want the service to start automatically upon OS startup, select Automatic.
If you select the manual startup type, you must start the service manually upon OS startup every time you want to use the service.
(Optional) Click the Start the service icon.
(Optional) If you want to use vSphere ESXi Image Builder with thevSphere Web Client, log out of the vSphere Web Client and log in again.
The Auto Deploy icon is visible on the Home page of the vSphere Web Client.
Question 2
Your security team is getting ready for an audit and wants to check the status of all ESXI hosts' outstanding security patches. Create a new fixed Update Manager baseline for all security ESXi host patches and name it ''Security patches.
''Use the patches available in the patch repository. Use VCSA01a in this task.
Baseline Name: Security Patches
Baseline Type: Host Patch
Category: Security
- See the Explanation below for Solution.
Correct answer: A
Explanation:
The Update Manager displays system managed baselines that are generated by vSAN. These baselines appear by default when you use vSAN clusters with ESXi hosts of version 6.0 Update 2 and later in your vSphere inventory. If yourvSphere environment does not contain any vSAN clusters, no system managed baselines are created.The system managed baselines automatically update their content periodically, which requires Update Manager to have constant access to the Internet. The vSAN system baselines are typically refreshed every 24 hours.You use system managed baselines to upgrade your vSAN clusters to recommended critical patches, drivers, updates or the latest supported ESXi host version for vSAN.System managed baselines cannot be edited or deleted. You do not attach system managed baselines to inventory objects in your vSphere environment. You can create a baseline group of multiple system managed baselines, but youcannot add any other type of basline to that group.Similarly, you cannot add a system managed baseline to a baseline group that contains upgrade, patch, and extension baselines. The Update Manager displays system managed baselines that are generated by vSAN. These baselines appear by default when you use vSAN clusters with ESXi hosts of version 6.0 Update 2 and later in your vSphere inventory. If your
vSphere environment does not contain any vSAN clusters, no system managed baselines are created.
The system managed baselines automatically update their content periodically, which requires Update Manager to have constant access to the Internet. The vSAN system baselines are typically refreshed every 24 hours.
You use system managed baselines to upgrade your vSAN clusters to recommended critical patches, drivers, updates or the latest supported ESXi host version for vSAN.
System managed baselines cannot be edited or deleted. You do not attach system managed baselines to inventory objects in your vSphere environment. You can create a baseline group of multiple system managed baselines, but you
cannot add any other type of basline to that group.
Similarly, you cannot add a system managed baseline to a baseline group that contains upgrade, patch, and extension baselines.
Question 3
As a member of the virtual infrastructure team, you have been tasked with creating a new guest customization specification and deploying a test virtual machine from an existing legacy template migrated from an old VMware VI3
environment To complete this task:
Deploy a new virtual machine with the name VM-GuestCust to esxi02a.vclass.local in cluster PROD-A using the following details: vCenter Server: vcsa01a.vdass.local Datastore: ProdDS01 Template; Core-Template The virtual machine
requires an additional network card with the type VMXNET3.
Create a new Guest Customization Spec with the name Custom-Spec using the following details:
Cust-Spec
Operating System: Windows Server 2008 R2
Registration Spec;
Name: vclass
Organization: VMware
The computer name must use the virtual machine name . Timezone must be set to America/Central Time Network Specifications:
IPv4 and IPv6 are set to DHCP but require a static DNS entry of 172.20.10.10 The computer must join the domain vclass.local using the following credentials:
Username: administrator
Password: VMware1!
- See the Explanation below for Solution.
Correct answer: A
Explanation:
/Reference:Select Menu > Policies and Profiles, and under Policies and Profiles, click VM Customization Specifications.Click the Create a new specification icon.The New VM Guest Customization Specification wizard opens.On the Name and target OS page, enter a name and description for the customization specification and select Windows as a target guest OS.(Optional) Select the Generate a new security identity (SID) option and click Next.A Windows Security ID (SID) is used in some Windows operating systems to uniquely identify systems and users. If you do not select this option, the new virtual machine has the same SID as the virtual machine or template from which itwas cloned or deployed.Duplicate SIDs do not cause problems when the computers are part of a domain and only domain user accounts are used. However, if the computers are part of a Workgroup or local user accounts are used, duplicate SIDs can compromise file access controls. For more information, see the documentation for your Microsoft Windows operating system.On the Set Registration Information page, enter the virtual machine owner's name and organization and click Next.On the Computer name page, enter a computer name for the guest operating system and a domain name.The operating system uses the computer name to identify itself on the network. On Linux systems, it is called the host name.ActionSelect this option to use the virtual machine name. Thecomputer name that vCenter Server creates is identical to thename of the virtual machine on which the guest operatingsystem is running. Ifthe name exceeds 63 characters, it is truncated.Select this option to be prompted to enter a name duringcloningor deployment.Enter a name.The name can contain alphanumeric characters and a hyphen(-).It cannot contain a period (.), blank spaces, or specialcharacters,and cannot contain digits only. Names are not case-sensitive.(Optional) To ensure that the name is unique, select the Append anumeric value check box.This action appends a hyphen followed by a numeric value to thevirtual machine name. The name is truncated if it exceeds 63characters when combined with the numeric value.Generate a name using the Optional: Enter a parameter that can be passed to the customapplication.configuredwithvCenterServerOn the Windows license page, provide licensing information for the Windows operating system and click Next.ActionType the Windows product key for the new guest operating system.operating systemsType the Windows product key for the new guest operating system.Select Include Server License Information.Select either Per seat or Per server.If you select Per server, enter the maximum number of simultaneousconnections for the server to accept.On the Set Administrator Password page, configure the administrator password for the virtual machine and click Next.Enter a password for the administrator account and confirm the password by typing it again.(Optional) Select the Automatically logon as Administrator check box to log users in to the guest operating system as Administrator, and select the number of times to log in automatically.On the Time zone page, select the time zone for the virtual machine and click Next.(Optional) On the Run Once page, specify commands to run the first time a user logs in to the guest operating system and click Next.See the Microsoft Sysprep documentation for information about RunOnce commands.On the Network page, select the type of network settings to apply to the guest operating system and click Next.Select Use standard network settings so that vCenter Server configures all network interfaces from a DHCP server by using the default settings.Select Manually select custom settings and configure each network interface yourself.Select a network adapter from the list or add a new one.For the selected NIC, click the vertical ellipsis icon and select Edit.The Edit Network dialog box opens.Click the IPv4 tab to configure the virtual machine to use IPv4 network.You can configure all the settings at that stage or you can select the Prompt the user for an IPv4 address when the specification is used option. In that case, vCenter Server prompts for an IP address when you select to apply thatcustomization specification during cloning or deployment. With that option, you can also configure the gateways during cloning or deployment.Click the IPv6 tab to configure the virtual machine to use IPv6 network.You can configure all the settings at that stage or you can select the Prompt the user for an address when the specification is used option. In that case, vCenter Server prompts for an IP address when you select to apply that customizationspecification during cloning or deployment. With that option, you can also configure the gateways during cloning or deployment. Click the DNS tab to specify DNS server details.Click WINS to specify primary and secondary WINS server information.Click OK to close the Edit Network dialog box.On the Set Workgroup or Domain page, select how the virtual machine participates in the network and click Next.ActionEnter a workgroup name. For example, MSHOME.Enter the domain name.To add a computer to the specified domain, enter the user name andpassword for a user account that has permission.On the Ready to complete page, review the details and click Finish to save your changes. /Reference:
Select Menu > Policies and Profiles, and under Policies and Profiles, click VM Customization Specifications.
Click the Create a new specification icon.
The New VM Guest Customization Specification wizard opens.
On the Name and target OS page, enter a name and description for the customization specification and select Windows as a target guest OS.
(Optional) Select the Generate a new security identity (SID) option and click Next.
A Windows Security ID (SID) is used in some Windows operating systems to uniquely identify systems and users. If you do not select this option, the new virtual machine has the same SID as the virtual machine or template from which it
was cloned or deployed.
Duplicate SIDs do not cause problems when the computers are part of a domain and only domain user accounts are used. However, if the computers are part of a Workgroup or local user accounts are used, duplicate SIDs can compromise file access controls. For more information, see the documentation for your Microsoft Windows operating system.
On the Set Registration Information page, enter the virtual machine owner's name and organization and click Next.
On the Computer name page, enter a computer name for the guest operating system and a domain name.
The operating system uses the computer name to identify itself on the network. On Linux systems, it is called the host name.
Action
Select this option to use the virtual machine name. The
computer name that vCenter Server creates is identical to the
name of the virtual machine on which the guest operating
system is running. If
the name exceeds 63 characters, it is truncated.
Select this option to be prompted to enter a name during
cloning
or deployment.
Enter a name.
The name can contain alphanumeric characters and a hyphen
(-).
It cannot contain a period (.), blank spaces, or special
characters,
and cannot contain digits only. Names are not case-sensitive.
(Optional) To ensure that the name is unique, select the Append a
numeric value check box.
This action appends a hyphen followed by a numeric value to the
virtual machine name. The name is truncated if it exceeds 63
characters when combined with the numeric value.
Generate a name using the Optional: Enter a parameter that can be passed to the custom
application.
configuredwithvCenter
Server
On the Windows license page, provide licensing information for the Windows operating system and click Next.
Action
Type the Windows product key for the new guest operating system.
operating systems
Type the Windows product key for the new guest operating system.
Select Include Server License Information.
Select either Per seat or Per server.
If you select Per server, enter the maximum number of simultaneous
connections for the server to accept.
On the Set Administrator Password page, configure the administrator password for the virtual machine and click Next.
Enter a password for the administrator account and confirm the password by typing it again.
(Optional) Select the Automatically logon as Administrator check box to log users in to the guest operating system as Administrator, and select the number of times to log in automatically.
On the Time zone page, select the time zone for the virtual machine and click Next.
(Optional) On the Run Once page, specify commands to run the first time a user logs in to the guest operating system and click Next.
See the Microsoft Sysprep documentation for information about RunOnce commands.
On the Network page, select the type of network settings to apply to the guest operating system and click Next.
Select Use standard network settings so that vCenter Server configures all network interfaces from a DHCP server by using the default settings.
Select Manually select custom settings and configure each network interface yourself.
Select a network adapter from the list or add a new one.
For the selected NIC, click the vertical ellipsis icon and select Edit.
The Edit Network dialog box opens.
Click the IPv4 tab to configure the virtual machine to use IPv4 network.
You can configure all the settings at that stage or you can select the Prompt the user for an IPv4 address when the specification is used option. In that case, vCenter Server prompts for an IP address when you select to apply that
customization specification during cloning or deployment. With that option, you can also configure the gateways during cloning or deployment.
Click the IPv6 tab to configure the virtual machine to use IPv6 network.
You can configure all the settings at that stage or you can select the Prompt the user for an address when the specification is used option. In that case, vCenter Server prompts for an IP address when you select to apply that customization
specification during cloning or deployment. With that option, you can also configure the gateways during cloning or deployment.
Click the DNS tab to specify DNS server details.
Click WINS to specify primary and secondary WINS server information.
Click OK to close the Edit Network dialog box.
On the Set Workgroup or Domain page, select how the virtual machine participates in the network and click Next.
Action
Enter a workgroup name. For example, MSHOME.
Enter the domain name.
To add a computer to the specified domain, enter the user name and
password for a user account that has permission.
On the Ready to complete page, review the details and click Finish to save your changes.